
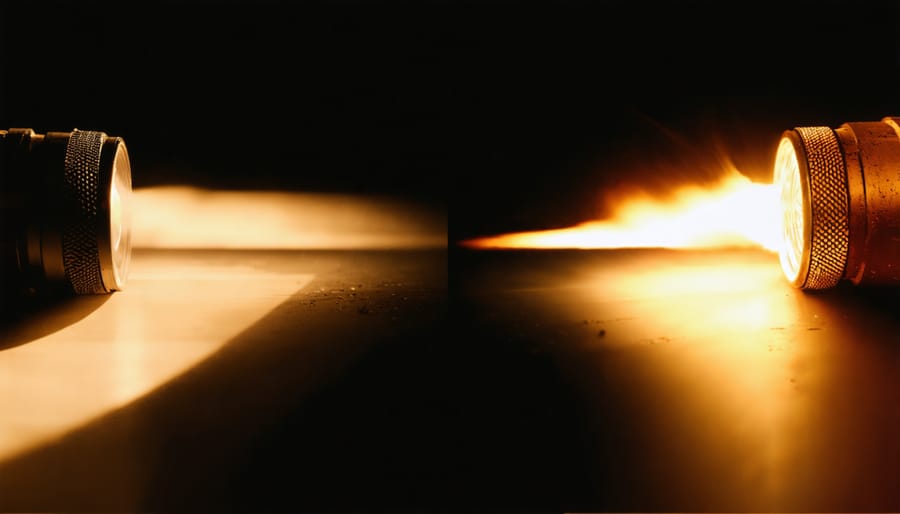
Why Your Torch Keeps Flickering Like a Lighter (And How to Fix It)
Is your torch flickering like a lighter instead of producing a steady beam? This frustrating issue often stems from common problems that are surprisingly easy to fix. High-quality torch lights should deliver consistent illumination, but factors like weak batteries, corroded contacts, or damaged switches can cause erratic lighting patterns.
Understanding why your torch misbehaves is the first step toward resolving the issue. Whether you’re an outdoor enthusiast relying on your flashlight for nighttime adventures or a homeowner keeping emergency lighting ready, a flickering torch can be more than just an annoyance – it’s a reliability concern that demands attention.
In this guide, we’ll explore the root causes of torch flickering, provide practical solutions to restore proper functionality, and share expert tips to prevent future issues. With the right knowledge and a few simple maintenance steps, you can transform your flickering torch back into the dependable light source you need.
Common Causes of Torch Light Flickering
Battery-Related Issues
Battery issues are among the most common lighting problems that cause torch lights to flicker like lighters. When batteries start to lose their charge, they can’t provide consistent power to the LED or bulb, resulting in irregular light output. This fluctuation often mimics the unstable flame of a lighter, creating an annoying and unreliable light source.
Several battery-related factors can trigger this issue. Weak or partially depleted batteries might not deliver enough voltage to maintain steady illumination. Sometimes, corrosion on battery contacts creates resistance, interrupting the power flow. Even mixing old and new batteries or using different battery brands can lead to uneven power distribution and flickering.
To resolve these issues, first check your battery levels using a multimeter or simply replace them with fresh ones. Clean any corroded contacts with a cotton swab dipped in vinegar, and always use matching batteries from the same manufacturer. Remember to remove batteries when storing your torch for extended periods to prevent damage from leakage.
Switch and Connection Problems
One of the most common reasons for torch lighting issues lies in its switch mechanism and electrical connections. When you press the switch and notice inconsistent lighting or flickering, it’s often due to worn-out contacts or loose wiring. Over time, the metal contacts inside the switch can become corroded or covered with debris, preventing proper electrical flow. Similarly, connections between the battery compartment and the light bulb might loosen from regular use or minor impacts.
To check for these issues, gently press the switch from different angles while the torch is on. If the light becomes steady with certain pressure points, you’ve likely identified a switch problem. For connection issues, try rotating the battery compartment slightly or tightening any visible screws. A quick cleaning of the battery contacts with a soft, dry cloth can also improve connectivity.
Remember that switch and connection problems are usually fixable without replacing the entire torch. However, if you notice severe corrosion or damaged wiring, it’s best to consult a professional or consider upgrading to a more reliable LED torch.
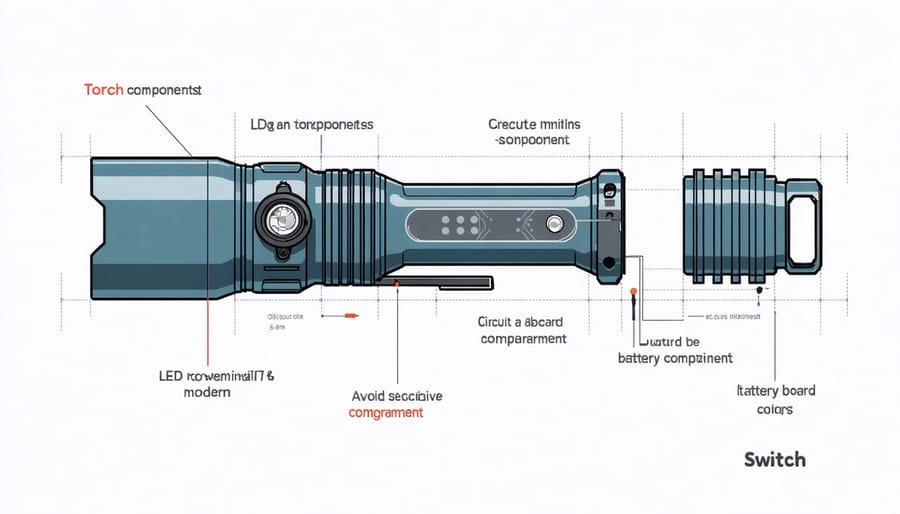
Understanding Your Torch’s Components
LED vs. Traditional Bulbs
The difference between traditional bulbs and modern LED lighting technology plays a crucial role in how your torch behaves. Traditional incandescent bulbs rely on a heated filament to produce light, which can be more susceptible to flickering when the power supply fluctuates. These bulbs also consume more energy and generate significant heat, making them less efficient for portable lighting solutions.
In contrast, LEDs use semiconductor technology to emit light, making them more stable and energy-efficient. However, LEDs are sensitive to voltage changes and require proper power regulation to function correctly. When your LED torch flickers like a lighter, it’s often due to loose connections, weak batteries, or damaged voltage regulators rather than the LED itself.
Understanding these differences can help you better diagnose the issue with your torch. While traditional bulbs might flicker due to physical movement or battery drain, LED flickering usually indicates an electrical system problem that needs attention.
Circuit Board and Wiring
The internal circuitry and wiring of your torch play a crucial role in maintaining a steady light output. When your torch flickers like a lighter, it’s often because of loose connections or corroded contact points within the circuit board. These components work together like a well-orchestrated team – when one part isn’t performing correctly, it affects the entire system.
The circuit board houses essential components that regulate power flow from your batteries to the LED or bulb. Over time, vibrations from regular use can cause these connections to become loose. Similarly, the spring contacts that connect your batteries to the circuit might lose their tension, creating intermittent power delivery that results in flickering.
Temperature fluctuations and humidity can also impact your torch’s internal wiring. When moisture seeps in, it can create oxidation on contact points, leading to resistance in the electrical path. This resistance disrupts the steady flow of power, causing your torch to behave more like a lighter than a reliable light source.
Regular maintenance and keeping your torch dry can help prevent these issues. If you notice flickering, check for loose battery connections first, as this is often the simplest fix.
DIY Solutions and Fixes
Quick Maintenance Tips
When your torch starts acting like a lighter, there are several quick fixes you can try before seeking professional help. First, check the fuel level – a low tank often causes inconsistent flame behavior. If you’re using a propane torch, ensure the tank is at least 25% full for optimal performance.
Clean the torch tip regularly using a soft wire brush. Built-up carbon deposits can restrict gas flow and cause irregular flames. While cleaning, inspect the O-rings and seals for any signs of wear or damage. These small components play a crucial role in maintaining proper gas pressure.
If you notice the flame still sputtering, adjust the air-fuel mixture by turning the adjustment collar near the base of the torch head. Start with a smaller flame and gradually increase it until you achieve a steady, blue flame.
Temperature can affect torch performance. If you’re working in cold conditions, warm the fuel tank slightly by keeping it in a heated space before use. Never use direct heat on the tank.
For battery-powered electronic ignition torches, check and clean the spark generator. Sometimes, debris can prevent proper sparking. Replace batteries if the ignition seems weak.
Remember to store your torch upright in a cool, dry place when not in use. This prevents fuel from pooling in unwanted areas and maintains the integrity of the internal components.

When to Replace Parts
Regular maintenance and timely replacement of torch components are essential for optimal performance and safety. Here’s a helpful guide to know when it’s time to replace key parts:
For the torch head, look for signs of physical damage, severe discoloration, or warping. If you notice any cracks or if the metal appears significantly weakened, it’s time for a replacement. Most torch heads last 2-3 years with proper care.
O-rings and seals should be replaced annually or whenever you notice signs of wear, cracking, or brittleness. These small components play a crucial role in preventing gas leaks, so don’t overlook them.
The ignition system typically needs replacement every 12-18 months, depending on usage. If you’re clicking more than 3-4 times to get a flame, or if the spark is weak and inconsistent, it’s time for a new igniter.
Gas valves should be replaced if you notice any sticking, unusual resistance when turning, or if the flame control becomes unreliable. These typically last 3-5 years but may need earlier replacement with heavy use.
Remember that environmental factors like humidity and temperature can affect component lifespan. Store your torch in a dry place and clean it regularly to extend the life of its parts. When in doubt about a component’s condition, it’s better to err on the side of caution and replace it.
Preventing Future Problems
Regular maintenance and proper care can significantly extend the life of your torch light and prevent those annoying lighter-like flickers. Here’s how to keep your torch light working smoothly:
Clean your torch regularly by gently wiping the lens and reflector with a soft, lint-free cloth. For stubborn dirt, use a mild soap solution, but avoid harsh chemicals that could damage the components. Make sure to dry thoroughly after cleaning.
Check the batteries or power source monthly. If you’re using rechargeable batteries, ensure they’re charged properly and replace them when they start showing signs of decreased performance. For solar-powered torches, keep the solar panels clean and positioned to receive maximum sunlight.
Store your torch in a cool, dry place when not in use. Excessive heat or moisture can damage internal components and lead to malfunctioning. If you’re storing it long-term, remove the batteries to prevent corrosion.
Pay attention to the O-rings and seals. These rubber components prevent moisture from entering the torch and should be replaced annually or when showing signs of wear. Apply a thin layer of silicone grease to keep them flexible and effective.
Consider using high-quality batteries from reputable manufacturers. While they might cost more initially, they’re less likely to leak and damage your torch’s internal components. For rechargeable options, invest in batteries with proper protection circuits.
Perform monthly function tests to catch potential issues early. Check all switches and modes, and look for any signs of damage or wear. Address minor problems promptly before they become major headaches.
Remember, prevention is always better than cure when it comes to torch maintenance. A well-maintained torch will provide reliable illumination when you need it most.
Understanding why your torch is lighting like a lighter can help you address and prevent this issue effectively. Remember to check your fuel quality, clean your torch regularly, and ensure proper fuel pressure for optimal performance. If you notice persistent flickering or lighter-like behavior, inspect the nozzle for blockages and verify that all connections are secure. For safety and efficiency, consider upgrading to newer torch models with improved ignition systems. Regular maintenance and using the right fuel type will help maintain consistent flame quality and extend your torch’s lifespan. If problems persist, don’t hesitate to consult a professional or contact the manufacturer for specific guidance.


