
Solar Grid Connection Made Simple: How Your Home Powers the Network
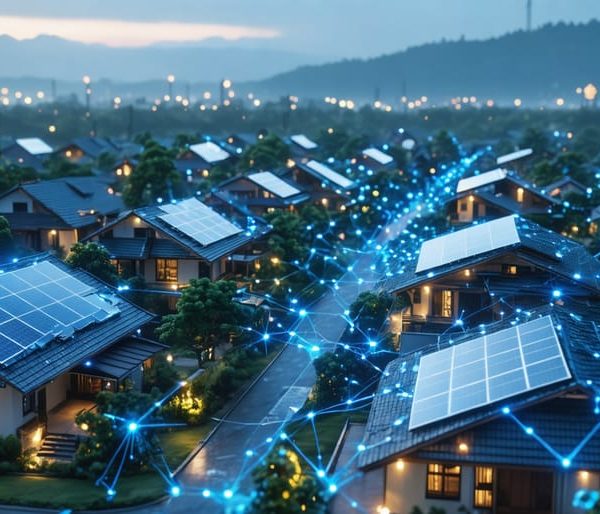
Connecting your solar system to the power grid transforms your home into an energy-efficient powerhouse, enabling you to both power your home and feed the grid. Modern grid-tied solar installations combine solar panels, inverters, and smart meters into a seamless system that maximizes energy production while ensuring safety and compliance with utility requirements.
Understanding your solar grid connection diagram isn’t just about technical specifications—it’s your roadmap to energy independence. Whether you’re planning a new installation or optimizing an existing setup, the right configuration ensures maximum power generation, efficient energy transfer, and reliable backup power during grid outages.
From the rooftop panels to your main electrical panel, every component plays a crucial role in creating a robust solar power system. This comprehensive guide breaks down the essential elements of grid connection diagrams, helping you visualize how solar energy flows through your home’s electrical system while maintaining the critical safety standards required by utility companies.
Understanding Your Solar Grid Connection System
Essential Components
A well-designed grid-tied solar systems rely on four key components working together seamlessly. Solar panels, typically mounted on your roof or ground arrays, capture sunlight and convert it into DC electricity. These panels are connected in series or parallel configurations to achieve your desired power output.
The inverter serves as the system’s heart, converting DC power from your panels into AC power that your home and the grid can use. Modern inverters often include smart monitoring capabilities, letting you track your system’s performance from your phone.
Your electrical meter plays a crucial role in measuring power flow between your home and the grid. Many utilities now install bi-directional meters that track both the power you consume and the excess energy you send back to the grid.
The grid connection point, including the main service panel and disconnect switches, ensures safe integration with the utility grid. This includes essential safety equipment like rapid shutdown devices and ground fault protection, giving you peace of mind while maintaining grid stability.

Safety Equipment Requirements
Safety should always be your top priority when connecting a solar power system to the grid. Every installation requires specific safety equipment to protect both people and property. The most crucial component is the rapid shutdown device, which quickly disconnects your solar system from the grid during emergencies or maintenance.
A properly rated circuit breaker is essential to prevent overloading, while surge protection devices guard against voltage spikes that could damage your equipment. You’ll also need a lockable AC disconnect switch, which allows utility workers to safely isolate your system from the grid when needed.
Ground fault protection is another vital requirement, protecting against electrical leakage that could create shock hazards. Make sure to install proper grounding equipment and lightning protection systems to safeguard your installation during storms.
Don’t forget personal protective equipment (PPE) during installation and maintenance. This includes insulated gloves, safety glasses, and non-conductive footwear. Remember, all safety equipment must meet local electrical codes and utility requirements, and should be regularly inspected and maintained to ensure proper functioning.
Breaking Down the Connection Diagram
Panel to Inverter Connection
Connecting your solar panels to the inverter is a crucial step in creating an efficient solar power system. Start by arranging your panels in series or parallel configurations, depending on your system’s voltage requirements and the inverter’s specifications. For residential installations, series connections are common, where the positive terminal of one panel connects to the negative terminal of the next.
Each panel string should be connected to a combiner box, which consolidates multiple panel connections into a single output. From the combiner box, run MC4 solar cables to your inverter’s DC input terminals. These specialized cables are weather-resistant and designed specifically for solar installations.
Remember to install DC disconnect switches between your panel array and the inverter. This safety feature allows you to cut power flow when needed for maintenance or emergencies. Use proper cable management techniques, including UV-resistant conduits and appropriate mounting hardware, to protect wiring from environmental damage.
When making connections, ensure all terminals are tight and properly weatherproofed. Double-check polarity before finalizing connections – reverse polarity can damage your inverter. It’s recommended to use a multimeter to verify voltage levels across your connections. Many modern inverters include built-in monitoring systems that help verify proper panel connection and performance.
For optimal safety and compliance, have a certified electrician review your connections before system activation. They can confirm proper grounding and verify that all components meet local electrical codes.
Inverter to Main Panel Integration
Connecting your solar inverter to the main electrical panel is a crucial step that requires careful attention to detail and proper safety measures. The process begins with installing a new double-pole circuit breaker in your main panel, sized according to your inverter’s output specifications.
Your solar installer will create a dedicated conduit run from the inverter to the main panel, ensuring all wiring is properly protected and meets local electrical codes. Inside this conduit, they’ll run two hot wires, a neutral wire, and a ground wire – all properly sized to handle the maximum current output of your inverter.
At the panel, the two hot wires connect to your new circuit breaker, while the neutral wire connects to the neutral bus bar and the ground wire to the ground bus bar. Most modern solar installations also include a production meter between the inverter and panel to monitor your system’s output.
Safety is paramount during this integration. The main power must be shut off before any connections are made, and the installation should include proper disconnects and overcurrent protection devices. Many jurisdictions require a visible disconnect switch near the panel for emergency responders.
Remember that this integration must be performed by a licensed electrician who understands both solar systems and local electrical codes. They’ll ensure your system meets all safety requirements and passes inspection before activation.

Grid Interface Connection
The final step in connecting your solar power system to the utility grid involves establishing a secure and code-compliant connection through your main electrical service panel. This connection point serves as the bridge between your solar installation and the broader power grid, allowing for seamless energy exchange.
Your system’s inverter output connects to a dedicated circuit breaker in your main panel, typically sized between 20 and 60 amps, depending on your system capacity. A critical component here is the utility-required disconnect switch, which must be installed in an easily accessible location. This switch allows utility workers to safely isolate your solar system from the grid when necessary for maintenance or emergency work.
Modern grid connections also incorporate smart meters that measure both incoming and outgoing power flow. These bi-directional meters track how much energy you’re drawing from the grid versus how much your solar system is feeding back, enabling accurate net metering calculations for your utility bills.
Safety features like anti-islanding protection are built into this connection point, automatically shutting down your system during power outages to prevent backfeeding electricity into the grid. This protection is essential for utility worker safety and is required by most local electrical codes.
Remember that the final grid connection must be completed by a licensed electrician and inspected by your local authority having jurisdiction (AHJ) before activation.
Smart Monitoring Systems
Energy Flow Tracking
Modern solar power systems come equipped with sophisticated monitoring tools that help you track energy production and consumption in real time. Through smart grid integration, homeowners can access detailed analytics via user-friendly mobile apps or web portals.
These monitoring systems typically display key metrics including daily energy production, grid power consumption, and excess energy exported back to the grid. Many systems feature colorful charts and graphs that make it easy to understand your energy patterns at a glance. You’ll be able to see how much energy your panels generate during peak sunlight hours and track your home’s energy usage throughout the day.
Most monitoring platforms also send automatic alerts about system performance issues and provide monthly reports summarizing your energy savings. This data helps you optimize your energy consumption habits and verify that your solar installation is operating at maximum efficiency. Some advanced systems even offer predictive analytics, helping you anticipate future energy needs based on historical usage patterns and weather forecasts.

Performance Analytics
Modern solar power systems come equipped with sophisticated monitoring capabilities that help you track and optimize your system’s performance. The key metrics to watch include daily energy production, power output efficiency, and grid export/import ratios. Most inverters now feature user-friendly apps that display real-time data, making it easy to spot any drops in performance.
To maximize your system’s efficiency, pay attention to the conversion rate, which typically ranges from 15-20% for residential systems. Regular monitoring helps identify issues like shading problems, dirty panels, or equipment malfunctions before they significantly impact your energy production.
Smart meters provide detailed insights into your consumption patterns and grid interaction. By analyzing this data, you can adjust your energy usage habits to maximize self-consumption during peak solar production hours. Many homeowners find they can achieve 30-40% better overall system performance simply by timing their major appliance usage with peak solar hours.
Weather patterns also play a crucial role in system performance. Modern monitoring systems can predict daily production based on weather forecasts, helping you plan your energy usage more effectively. This proactive approach to system management typically results in better financial returns and more reliable power supply.
Common Installation Challenges
Technical Hurdles
While connecting solar panels to the power grid is achievable for most properties, several technical challenges often arise during the process. The most common hurdle is voltage mismatch between your solar system and the grid. To address this, ensure your inverter is properly sized and configured to match your local grid specifications.
Intermittency issues can also pose challenges, especially when clouds pass overhead or during seasonal changes. Installing a hybrid inverter with battery backup can help smooth out these fluctuations and maintain consistent power flow. Some homeowners also face complications with their existing electrical panel capacity. If your panel is older or at maximum capacity, you might need an upgrade before adding solar.
Ground fault protection and anti-islanding requirements can be tricky to navigate. Modern inverters typically come with built-in safety features, but you’ll need to verify they meet local utility standards. Another frequent challenge is power quality issues, including harmonic distortion. Quality solar equipment and proper installation can minimize these concerns.
Communication problems between smart meters and solar monitoring systems sometimes occur. Working with certified installers who understand both solar and grid infrastructure can help prevent these issues. Remember to factor in future expansion possibilities when sizing your system components, as upgrading later can be more complicated and costly than planning ahead.
Most technical hurdles can be overcome with proper planning and professional guidance. Always consult with certified solar installers and your local utility company before beginning your installation project.
Utility Requirements
Before connecting your solar power system to the grid, you’ll need to meet specific grid integration requirements set by your local utility company. These requirements ensure safe and efficient power distribution while protecting both the grid and your solar installation.
Start by contacting your utility provider to obtain their interconnection guidelines. Most companies require professional certification of your system’s components and installation. You’ll typically need to submit detailed documentation, including:
– System size and specifications
– Equipment certifications (inverters, panels, and safety devices)
– Single-line electrical diagrams
– Proposed installation layout
– Protection schemes and disconnect locations
Many utilities mandate the installation of a bi-directional meter to measure power flow in both directions. They may also require specific inverter settings to prevent unwanted power feedback during grid outages.
The approval process usually involves an application, documentation review, and site inspection. Timeline varies by location but typically takes 2-8 weeks. Some utilities also require you to carry additional insurance coverage for grid-connected systems.
Remember that requirements can vary significantly between regions and utility companies. Working with a certified solar installer familiar with local regulations can help streamline this process and ensure compliance with all necessary specifications.
Understanding and implementing a solar power grid connection doesn’t have to be overwhelming. By following proper diagrams and guidelines, you can successfully integrate solar power into your home’s electrical system while maintaining safety and efficiency. Remember that the key components – solar panels, inverters, meters, and safety switches – work together as a unified system to provide clean, renewable energy for your property.
Before starting your solar journey, ensure you have all necessary permits and work with certified installers who understand local regulations. Keep your connection diagrams accessible for future reference and maintenance. Regular system checks will help maintain optimal performance and ensure your investment continues to deliver maximum benefits.
As solar technology continues to evolve, stay informed about new developments that could enhance your system’s efficiency. Consider joining local renewable energy groups or online communities to share experiences and learn from others who have successfully connected their solar systems to the grid.
Taking the step toward solar power isn’t just about reducing electricity bills – it’s about contributing to a sustainable future. Whether you’re a homeowner or property manager, your decision to embrace solar energy helps create a cleaner environment for future generations. Start your solar journey today by consulting with qualified professionals and using the resources provided in this guide to make informed decisions about your installation.


