
Power Your RV Adventure: Build a Solar System That Never Leaves You Stranded
Transform your RV into a self-sustaining adventure machine with a powerful off-grid solar system that delivers reliable power anywhere the road takes you. Modern solar technology has revolutionized how we experience mobile living, making it possible to run everything from air conditioners to kitchen appliances while completely disconnected from shore power.
Whether you’re a weekend warrior or full-time RVer, solar power independence means choosing prime boondocking spots without worrying about generator noise or fuel costs. Recent advances in lithium batteries and high-efficiency panels have made these systems more powerful and affordable than ever, with complete setups capable of generating 1,000+ watts daily while taking up minimal roof space.
This guide walks you through selecting, sizing, and installing the perfect solar setup for your specific RV lifestyle – from basic systems that keep your lights and devices charged to comprehensive solutions that power every modern convenience. We’ll focus on practical, tested configurations that real RVers use successfully in the field, helping you make informed decisions about your investment in mobile energy independence.
Essential Components of an RV Solar System
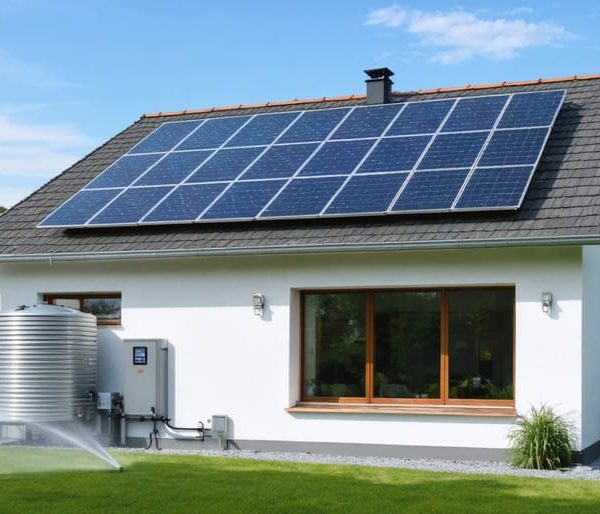
Solar Panels and Mounting Options
When choosing solar panels for your RV, flexible and rigid panels are your main options. Flexible panels are lightweight, thin, and conform to slightly curved surfaces, making them ideal for curved RV roofs. While they typically offer less efficiency than rigid panels, their aerodynamic profile reduces fuel consumption.
Rigid panels, though heavier, provide better durability and higher power output. These traditional panels are perfect for flat RV roofs and can withstand harsh weather conditions. Many RV owners prefer rigid panels for their superior longevity and performance.
For mounting, you have several reliable options. Z-brackets offer a simple, permanent solution that elevates panels slightly above the roof, allowing airflow for cooling. Corner brackets provide a low-profile installation but require more mounting points. Tilt mounts, while more expensive, allow you to adjust panel angles for maximum sun exposure when parked.
Remember to use appropriate sealants and mounting hardware designed for mobile applications to prevent water leaks and ensure your panels stay secure during travel. Always consider your RV’s roof structure and weight limitations when selecting both panels and mounting systems.

Battery Storage Solutions
Choosing the right battery storage solutions is crucial for your RV’s off-grid power system. Lithium-ion batteries have become increasingly popular due to their longer lifespan, lighter weight, and deeper discharge capability compared to traditional lead-acid batteries. While they cost more upfront, their superior performance and minimal maintenance requirements make them an excellent long-term investment.
For those on a tighter budget, AGM (Absorbed Glass Mat) batteries offer a reliable middle-ground option. They’re more durable than standard lead-acid batteries and require no maintenance, though they don’t match lithium’s performance.
When sizing your battery bank, consider your daily power usage and the number of days you plan to camp without solar charging. A good rule of thumb is to multiply your daily power consumption (in watt-hours) by 2-3 days of autonomy. For example, if you use 2000Wh daily, aim for a 4000-6000Wh battery capacity to ensure comfortable off-grid living without running low on power.
Remember to factor in temperature effects, as battery performance can decrease significantly in cold weather. Installing your batteries in a temperature-controlled environment will help maintain their efficiency and extend their lifespan.
Charge Controllers and Inverters
The heart of your RV solar setup lies in two crucial components: charge controllers and inverters. A charge controller acts as a guardian for your batteries, preventing overcharging while ensuring optimal power flow from your solar panels. The most efficient option is an MPPT (Maximum Power Point Tracking) controller, which can increase charging efficiency by up to 30% compared to simpler PWM controllers.
Your inverter transforms the DC power stored in batteries into AC power that your regular RV appliances can use. Pure sine wave inverters are the gold standard for RVs, providing clean power that’s safe for sensitive electronics like laptops and TVs. When selecting these components, consider your total power needs – a good rule of thumb is to choose an inverter rated at least 20% higher than your expected maximum load. For reliability, stick with reputable brands and ensure both components are properly sized for your system’s capacity.
Planning Your RV Solar System
Power Consumption Assessment
Before installing your RV solar system, accurately calculating power requirements is essential for proper system sizing. Start by creating a detailed inventory of all your electrical devices, including their wattage ratings. Common RV appliances include:
– Refrigerator: 120-600W
– Microwave: 1000-1500W
– Air conditioner: 1400-2000W
– LED lights: 3-10W each
– Laptop charger: 45-100W
– Water pump: 100W
To determine your daily power consumption, multiply each device’s wattage by the number of hours you expect to use it per day. For example, if your 600W refrigerator runs for 8 hours daily, it consumes 4,800 watt-hours (Wh) per day.
Add up all your daily power needs to get your total consumption. Remember to account for energy peaks when multiple devices run simultaneously. It’s recommended to add a 20% buffer to your calculations to accommodate unexpected usage and system inefficiencies.
Keep a power consumption log for a week during typical RV use to get the most accurate assessment. This real-world data will help you choose the right solar panel capacity and battery storage for your needs.
System Sizing and Component Selection
Selecting the right components for your RV solar system starts with calculating your daily power needs. Begin by listing all your electrical devices and their wattage, then multiply by the hours you typically use them each day. This gives you your daily power consumption in watt-hours, which is crucial for proper system sizing.
For most RV setups, we recommend starting with solar panels that can generate at least 20-30% more power than your daily needs to account for inefficiencies and cloudy days. A typical RV setup might include 200-400 watts of solar panels, though larger rigs with more amenities may require up to 800 watts or more.
Your battery bank should be sized to store at least two days’ worth of power usage. For most RVers, this means 200-400 amp-hours of battery capacity using lithium batteries, which offer better performance and longevity than traditional lead-acid batteries. Remember that you should only discharge lithium batteries to 20% capacity to maintain their lifespan.
The charge controller should match your solar panel array’s voltage and amperage. For most RV systems, a 30-50 amp MPPT charge controller works well, offering better efficiency than PWM controllers. When selecting an inverter, choose one rated at least 20% higher than your highest simultaneous power draw. A 2000-3000 watt pure sine wave inverter is suitable for most RV applications.
Don’t forget essential safety components like circuit breakers, fuses, and proper gauge wiring. For panels mounted on your RV roof, ensure your mounting hardware is sturdy and weatherproof. We recommend using MC4 connectors and UV-resistant solar cable for all connections.
Start small if you’re unsure – you can always expand your system later. Consider future power needs when selecting components, and choose equipment from reputable manufacturers with good warranty coverage and customer support.

Installation and Setup Tips
Tools and Safety Considerations
Before starting your RV solar installation, gather essential tools including a wire crimper, wire stripper, multimeter, drill and drill bits, screwdrivers (both Phillips and flathead), and socket wrench set. You’ll also need safety equipment like insulated gloves, safety glasses, and non-conductive tools when working with electrical components.
Always disconnect your RV’s shore power and house batteries before beginning any installation work. When mounting solar panels on your RV’s roof, use appropriate fall protection equipment and ensure you have a sturdy ladder. Work with a partner whenever possible, especially when handling large solar panels or working at height.
Be cautious of sharp edges on mounting hardware and use appropriate sealants to prevent water infiltration around roof penetrations. Keep a fire extinguisher rated for electrical fires nearby, and never work on the system during adverse weather conditions.
Remember to document your wiring connections with photos or diagrams before making any changes. This will help troubleshoot issues later and ensure proper system reassembly. If you’re unsure about any aspect of the installation, consult a qualified professional rather than risking damage to your RV or personal injury.
Wiring and Connection Guidelines
Proper wiring your solar system is crucial for safety and efficiency in your RV setup. Always use marine-grade cables designed for outdoor use, as they offer better protection against moisture and UV exposure. When connecting your solar panels to the charge controller, ensure your wire gauge matches your system’s amperage – typically 10 or 8 AWG for most RV installations.
Keep all connections weatherproof by using waterproof junction boxes and appropriate connectors. Create strain relief points to prevent cable movement from loosening connections, and secure wires along your RV’s roof using UV-resistant cable ties or conduit.
For battery connections, use thick cables (usually 4 or 2 AWG) to handle the higher current flow. Always connect the negative terminal last and disconnect it first when working on the system. Install fuses or circuit breakers between major components – one between the panels and charge controller, and another between the batteries and inverter.
Color-coding your wires makes future maintenance easier: red for positive, black for negative. Keep your wiring runs as short as possible to minimize voltage drop, and avoid sharp bends that could damage the cables over time.
Ground your system properly by connecting all metal components to your RV’s chassis ground. This provides essential protection against electrical faults and lightning strikes. Label all connections clearly and create a simple wiring diagram for future reference or troubleshooting.

Maintenance and Troubleshooting
Regular maintenance is crucial for keeping your RV’s off-grid solar system running efficiently. Start by cleaning your solar panels monthly, or more frequently if traveling in dusty areas. Use a soft brush and mild soap solution to remove dirt, bird droppings, and debris that can reduce panel efficiency. Always clean panels during cooler hours to prevent thermal shock.
Check your battery terminals every three months for corrosion and ensure connections remain tight. Apply a thin layer of petroleum jelly to terminals to prevent oxidation. Monitor battery fluid levels in flooded lead-acid batteries monthly, topping up with distilled water when necessary.
Inspect wiring connections quarterly for signs of wear, loose connections, or damage from vibration. Pay special attention to areas where wires may rub against metal surfaces. Use cable ties to secure loose wires and replace any damaged insulation immediately.
Common troubleshooting scenarios include:
– System not charging: Check fuses, verify charge controller settings, and ensure panels are clean and unshaded
– Battery not holding charge: Test battery voltage, inspect for sulfation, and verify proper charging parameters
– Inverter issues: Reset the unit, check error codes, and confirm proper voltage input
– Reduced power output: Monitor panel temperature, clean surfaces, and verify proper angle positioning
Keep a maintenance log to track system performance and schedule regular checks. Use a multimeter to perform monthly voltage tests on batteries and panels. This helps identify potential issues before they become major problems.
For optimal performance, update charge controller settings seasonally to account for temperature changes. Consider investing in a basic solar system monitoring device to track power generation and consumption patterns.
Remember to carry basic spare parts like fuses, connectors, and a multimeter during your travels. Having these items on hand can save you from unexpected power interruptions while off-grid.
Embracing solar power for your RV is more than just a trend – it’s a gateway to true freedom and sustainable adventure. Throughout this guide, we’ve explored how an off-grid solar system can transform your RV experience, from selecting the right components to proper installation and maintenance. By harnessing the sun’s energy, you’re not only reducing your environmental footprint but also gaining independence from traditional power sources.
Remember that successful solar implementation starts with careful planning and accurate system sizing. Whether you’re a weekend warrior or full-time RVer, your solar setup should match your specific power needs and travel style. The initial investment in quality components and proper installation will pay dividends through years of reliable, clean energy.
The RV community continues to grow, and more adventurers are discovering the benefits of solar power every day. From quiet, emission-free operation to the ability to camp in remote locations, solar energy opens up countless possibilities for your travel experience. As technology advances and components become more efficient, there’s never been a better time to make the switch to solar.
Take the next step in your RV journey by implementing the knowledge you’ve gained here. With proper planning and execution, you’ll soon be enjoying the freedom and peace of mind that comes with having a reliable, sustainable power source wherever your adventures take you.


