How to Set Up Lighting for Paint Correction Defect Visibility (Step-by-Step)
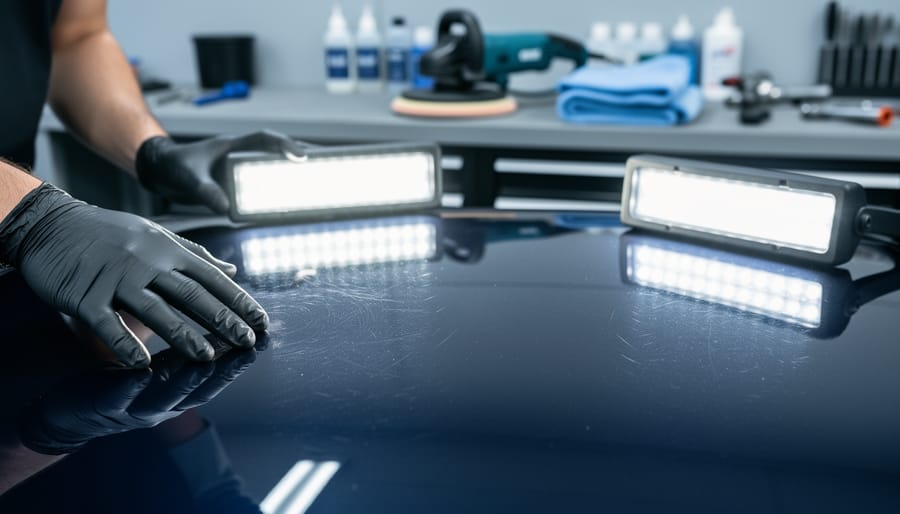
Achieving flawless paint correction starts with seeing what’s actually there. The key to revealing swirls, scratches, holograms, and oxidation is combining high-intensity LED work lights with correct positioning at shallow angles (15 to 30 degrees) to the paint surface. Standard overhead shop lighting simply won’t cut it because defects become visible only when light bounces off imperfections at specific angles, creating the contrast you need to guide your polishing work.
Professional detailers know that missing defects during the inspection phase means wasted hours with a DA polisher and disappointed clients. Whether you’re setting up a garage workspace or operating a mobile detailing service, your lighting setup determines your correction quality.
The good news? You don’t need expensive permanent installations to achieve professional-grade defect visibility. Solar-powered LED panels and rechargeable battery-powered work lights have transformed paint inspection, giving mobile detailers the same inspection capabilities as fixed workshops without the electrical infrastructure or ongoing energy costs. Many detailers report cutting their monthly shop electricity bills by 30 to 40 percent after switching to solar-charged inspection lighting.
This guide walks you through selecting the right lighting tools, positioning them for maximum defect revelation, and verifying your setup actually works before you start cutting paint. You’ll learn why color temperature matters, how to create overlapping light zones, and simple techniques for confirming you’re seeing every imperfection that needs attention. Using the right lighting alongside your DA polisher ensures professional results every time.
Why Standard Garage Lighting Fails to Reveal Paint Defects
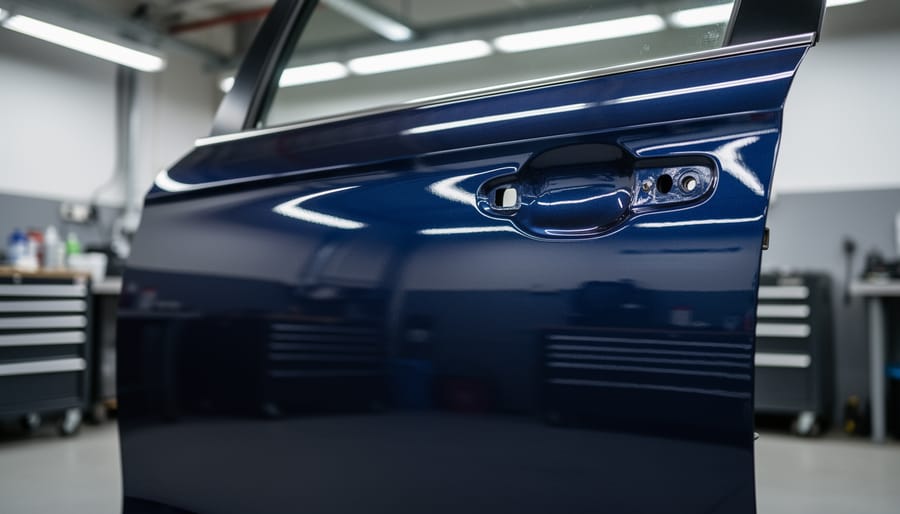
Standard garage lighting creates a false sense of clarity. Most workshops rely on overhead fluorescent tubes or basic LED shop fixtures mounted to the ceiling, designed for general visibility rather than precision inspection. These systems flood the space with diffused, even light that makes paint surfaces appear smooth and uniform. That diffusion is exactly the problem. Swirl marks and light scratches thrive in soft, scattered illumination because the light scatters across defects rather than reflecting off them at revealing angles.
Single-source overhead lighting compounds the issue by casting shadows across curved body panels. A hood or fender that looks flawless under a single ceiling fixture will hide entire zones of damage in the shadow areas. You won’t see those defects until you’re halfway through polishing, or worse, after you’ve applied your final protection layer and moved the vehicle into sunlight. The frustration of discovering scratches you swore weren’t there an hour earlier stems directly from inadequate inspection lighting.
Color temperature plays an equally critical role. Standard fluorescent fixtures typically emit light in the 3000-4000K range, a warm spectrum that masks oxidation and makes holograms nearly invisible. These lighting artifacts only become apparent under daylight conditions around 5500K, which is why a paint correction job that looked perfect indoors can reveal buffer trails and residual hazing the moment it leaves the garage. Your eyes need the right wavelength information to distinguish between true gloss and hidden defects, and conventional lighting systems simply don’t deliver it.
Essential Tools and Materials for Paint Inspection Lighting
Setting up effective paint inspection lighting requires specific equipment that goes beyond your workshop’s existing fixtures. The right tools reveal every swirl, scratch, and oxidation mark before you begin polishing, preventing rework and delivering professional results.
Your primary investment should be high-intensity LED work lights rated between 2000 and 4000 lumens per fixture. These provide the brightness needed to highlight defects that standard garage lighting misses entirely. Look for adjustable models that let you fine-tune the Kelvin rating between 5000K and 6500K, this daylight spectrum range shows true paint color and reveals holograms that warmer bulbs conceal. Lower Kelvin ratings (3000-4000K) produce yellowish light that masks imperfections, while higher ratings above 7000K create a harsh blue tint that distorts color accuracy.
Adjustable light stands or mounting arms give you precise control over positioning. Choose stands with telescoping height adjustment from 3 to 7 feet and weighted bases that won’t tip when you bump them during inspection. Articulating mounting arms that clamp to workbenches or door frames work well in tight spaces where floor stands create obstacles.
- High-intensity LED work lights (2000-4000 lumens, 5000-6500K adjustable)
- Adjustable light stands with weighted bases or articulating mounting arms
- Solar-powered portable LED panels (50-100 watt) for outdoor and off-grid setups
- Extension cords (12-14 gauge, 25-50 feet) or solar battery packs (200-400 watt-hour capacity)
- Color-corrected inspection lamps (optional, for final verification)
- Power strips with surge protection for multiple grid-powered fixtures
- Solar charge controllers and inverters (if building permanent solar system)
Solar-powered portable LED panels have become practical alternatives for mobile detailers and workshops looking to cut electricity costs. A 100-watt solar panel paired with a 300 watt-hour battery pack can run two 40-watt LED work lights for 6-7 hours, enough for a full day’s inspection work. Professional detailers report electricity savings of $30-60 monthly when switching primary inspection lighting to solar, with payback periods under two years for quality equipment.
Extension cords should be heavy-gauge (12 or 14 AWG) to prevent voltage drop that dims your lights. If you’re building a solar system, you’ll need a charge controller to protect batteries and an inverter to run standard AC-powered LED fixtures from DC battery storage.
Understanding Light Temperature and Angle for Defect Detection
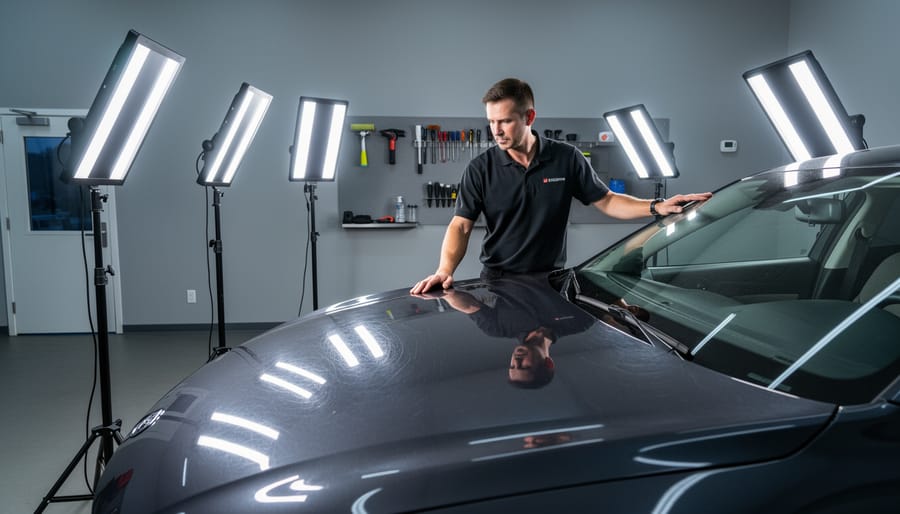
Light temperature and angle matter far more than brightness alone when hunting paint defects. Most detailers start by cranking up wattage, but a poorly positioned 5000-lumen fixture will hide scratches that a 2000-lumen light reveals when placed correctly.
Kelvin ratings measure color temperature, the visual warmth or coolness of your light source. Standard garage fluorescents sit around 4000K (slightly yellow-white), which masks oxidation and makes holograms, those faint rainbow swirls left by rotary polishers, nearly invisible. The 5000-6500K daylight spectrum renders paint in true color, exposing every defect your eyes would catch outdoors at noon. Below 5000K, you’ll miss subtle clear coat damage; above 6500K shifts toward blue-white, which flattens contrast on metallic finishes. If your current lights don’t list Kelvin ratings, they’re likely 3000-4000K and inadequate for inspection work.
Angle transforms what you see. Perpendicular light, shining straight down at 90 degrees, bounces directly back into your eyes, creating a uniform glow that conceals scratches. Oblique angles (30-45 degrees from the paint surface) force light to skim across imperfections, casting micro-shadows in every groove. Swirls and scratches become dark lines against the illuminated clear coat. Position your fixture too steep (above 50 degrees), and you’ll see reflections of the light itself rather than defects. Too shallow (below 25 degrees), and curved panels create glare zones. The sweet spot between 30-45 degrees consistently reveals both heavy compound scratches and fine 2000-grit sanding marks across hoods, doors, and quarter panels.
Cross-hatching refers to the pattern created when you position lights from opposite sides, one from driver’s side at 35 degrees, another from passenger side at the same angle. This overlapping coverage eliminates shadows that hide defects on curved body lines and door edges. Single-source lighting always leaves blind spots where your body or the vehicle’s contours block illumination. Professional correction shops run three or four lights around each vehicle, ensuring every panel receives cross-angled coverage before polishing begins.
Safety Warnings and Workspace Preparation
Before positioning your first light, take time to address safety concerns specific to detailing environments. Water and chemical overspray create unique electrical hazards that standard workshop setups don’t face, and the high-intensity lighting required for defect inspection introduces risks most DIY detailers overlook.
Start by evaluating electrical safety in your workspace. Detailing involves constant water use, wash runoff, spray bottles, and wet surfaces create conductive paths between your lighting equipment and the floor. Plug all grid-powered lights into GFCI-protected outlets, which cut power instantly if moisture causes a short circuit. Keep extension cords elevated off wet floors using cable hooks or stands, and never run cords through standing water or puddled areas. If you’re setting up solar-powered LED systems with battery packs, ensure the battery housing is rated for damp locations (look for IP65 or higher ingress protection). Position solar batteries on elevated shelves or waterproof storage boxes, never directly on concrete floors where condensation accumulates.
Secure every light stand to prevent tip-overs. Inspection lights positioned at oblique angles often have stands extended to maximum height, creating top-heavy configurations. Use sandbag weights on the base of each stand, or tether tall fixtures to wall hooks with adjustable straps. A falling LED work light can shatter on impact, but more dangerously, it can strike and crack paint, windshields, or mirrors during your setup.
Eye strain becomes serious during extended defect inspection sessions under high-intensity lighting. The 5000-6500K daylight spectrum necessary for revealing swirls produces blue-wavelength light that fatigues eyes faster than warm lighting. Wear safety glasses with slight amber or yellow tint to filter blue peaks without distorting defect visibility, and follow the 20-20-20 rule: every twenty minutes, look at something twenty feet away for twenty seconds. If using older halogen work lights instead of LEDs, ensure adequate ventilation since halogens generate significant heat and can off-gas when new, causing headaches in enclosed garages.
Step-by-Step Process: Setting Up Your Defect Inspection Lighting System
Step 1: Position Your Vehicle and Assess the Workspace
Park your vehicle in the center of your workspace, leaving at least four feet of clearance on all sides. This spacing lets you move freely with light stands and prevents shadows from walls or equipment. If possible, position the vehicle perpendicular to any windows, natural sunlight creates inconsistent inspection conditions as it shifts throughout the day, so you’ll want window coverage within reach.
Walk a complete circle around the vehicle and note every existing light source. Overhead shop lights, windows, open doors, and even reflective surfaces like tool cabinets all affect what you’ll see during inspection. You’ll need to control or eliminate these before introducing your dedicated inspection lighting. Mark which fixtures you can turn off and which require temporary blocking with curtains or cardboard.
For solar-powered setups, scout your workspace perimeter for southern exposure (northern hemisphere) where panels can capture maximum sunlight. Measure the distance from your vehicle to this location, you’ll need cable length to connect panels to your battery pack. Portable solar systems work best when panels sit outside while batteries stay near your work area, eliminating long power runs that waste voltage.
Step 2: Install Primary Inspection Lights at Optimal Angles
Begin by securing your primary LED work light on an adjustable stand approximately three to four feet from the vehicle’s surface. Position the light head at a 30 to 45-degree angle relative to the panel you’re inspecting, this oblique angle creates the shadow relief that makes scratches and swirls visible. A perpendicular light simply bounces straight back, hiding defects.
Set the light height between eye level and six inches above it. This range keeps illumination consistent as you move around the vehicle while preventing harsh overhead shadows. For curved panels like fenders and hoods, aim for the midpoint of the curve rather than the edge.
Connect your power source based on your setup. Grid-powered LEDs simply plug into standard outlets. For solar battery packs, calculate your runtime needs: a 2000-lumen LED drawing 20 watts requires a 100-watt-hour battery for five hours of continuous use. Most portable solar generators display remaining capacity in watt-hours, making this calculation straightforward.
Lock the stand’s adjustment knobs firmly once positioned. A shifting light mid-inspection creates inconsistent defect visibility and wastes time. Test stability by gently pressing the light head, it shouldn’t move.
Step 3: Add Secondary Cross-Lighting to Eliminate Shadows
Once your primary light reveals defects from one direction, shadows still hide imperfections on the opposite side of body contours. Position a second high-intensity LED at the opposite 30-45 degree angle to your first light, creating cross-illumination that eliminates these blind spots. For a hood, this means one light from the driver’s side front corner and another from the passenger’s side, the overlapping zones expose swirls that single-source lighting misses entirely.
Curved panels like fenders and door edges benefit most from this dual-angle approach. As light hits from opposing directions, scratches and holograms appear regardless of their orientation in the clear coat. Aim for roughly equal intensity between both sources to prevent one light from overpowering the other and recreating shadow problems.
Test your setup by slowly walking around the vehicle while observing a known defective area. Defects should remain visible from multiple viewing positions without vanishing as you move. If certain angles still show clean paint where you know damage exists, adjust the secondary light’s position until those zones reveal their true condition.
Step 4: Adjust Light Temperature and Intensity
With your lights positioned correctly, the next critical adjustment is dialing in the right color temperature and brightness level. Start by setting your LED work lights to 5000-6500K if they have adjustable Kelvin controls, this daylight spectrum reveals true paint color and makes defects like oxidation and holograms visibly distinct. Many basic LEDs ship at 3000K (too warm and yellow) or 7000K+ (harsh blue-white), both of which mask swirl patterns.
Now adjust intensity. If the surface appears washed out or you’re squinting from glare, dim the lights until you see clear contrast between scratches and clean paint. Too dim, and fine 2000-grit sanding marks disappear. Test by inspecting a known defect area, you should spot individual scratches without straining. Solar-powered systems with dimmer controls let you fine-tune brightness while conserving battery power for extended sessions. On dark colors like black or navy, slightly higher intensity helps, but stop before the reflection becomes a bright white blob that hides everything underneath.
Step 5: Test Visibility Across Different Paint Colors and Panels
Start your inspection at the hood, which typically reveals defects most clearly due to its horizontal orientation. Move methodically around the vehicle, from hood to front fenders, doors, rear quarters, and trunk, examining each panel from multiple angles. Pay extra attention to dark-colored paint like black, navy, or deep burgundy, where swirls and light scratches blend into the finish. Crouch down to view panels at different heights, watching how the light catches imperfections. If a panel looks suspiciously clean, adjust your light angle slightly or move closer with a handheld inspection lamp. On curved surfaces like fender arches, reposition your primary light to maintain that critical 30-45 degree angle. This systematic walk-around confirms your lighting setup works across the entire vehicle before you touch a polisher.
Solar-Powered Lighting Solutions for Mobile and Workshop Detailing
Switching to solar power transforms paint correction work from an electricity-dependent operation into a sustainable, cost-effective process. For mobile detailers working in customer driveways or workshop owners tired of rising utility costs, solar workspace lighting delivers professional-grade defect visibility without the monthly bills.
Start with a simple calculation: two 2000-lumen LED work lights running six hours daily consume roughly 120 watts total, or 720 watt-hours per session. A 200-watt solar panel paired with a 500-watt-hour lithium battery handles this load easily, even on overcast days when panel output drops to 60-70 percent. Position your panel to capture maximum midday sun, typically facing south at a 30-degree tilt in most regions, and you’ll generate enough surplus to charge batteries for evening inspections.
Battery selection matters more than beginners realize. Lithium-ion units weigh half what lead-acid batteries do and cycle 2000 times versus 500, making them ideal for daily detailing work. A 100-amp-hour lithium battery stores roughly 1200 watt-hours, giving you two full inspection sessions before recharging. For cloudy stretches or night work, size up to 200 amp-hours to maintain three-day autonomy.
Mobile detailers gain immediate advantages from portable solar panels that fold into carrying cases. Set up your panel in the customer’s yard while you work, and your inspection lights run indefinitely without asking to plug into their outlets. This independence opens opportunities at commercial sites, parking structures, and outdoor events where grid access doesn’t exist.
The numbers justify the investment quickly. Grid electricity for six-hour daily lighting runs $15-25 monthly at typical rates, $180-300 yearly. A complete 200-watt solar setup costs $800-1200 installed, meaning you break even in four years while gaining 20-plus years of free power. Workshop owners running multiple bays slash energy bills by 40-60 percent when solar handles inspection lighting, compressors, and ventilation fans simultaneously.
Mike Chen, who runs a mobile paint correction service in Arizona, made the switch in early 2025: “I was skeptical about solar until I calculated I’d spent $340 on electricity just for lighting in 2024. My portable 300-watt panel setup paid for itself in 18 months, and now I book jobs in remote areas my competitors can’t reach.”
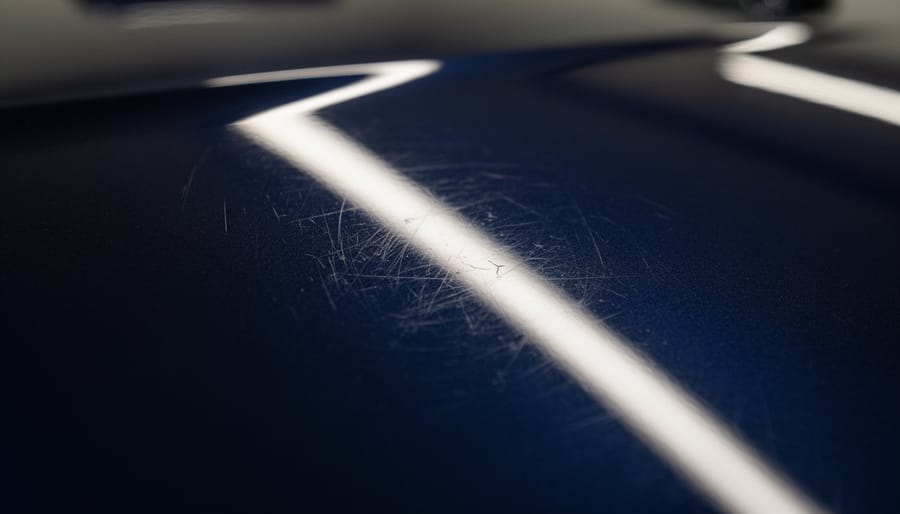
Verification and Testing Your Lighting Setup
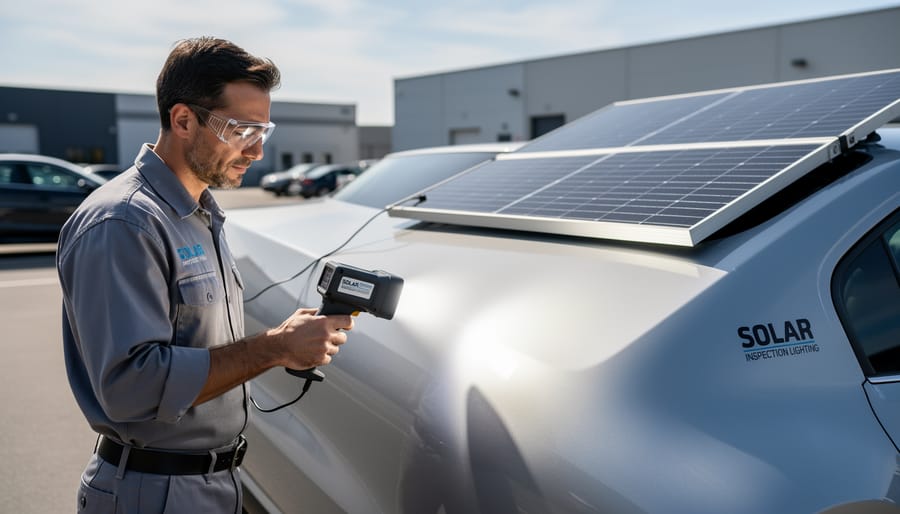
Once your lights are positioned, run a deliberate verification routine to confirm the setup actually reveals what you need to see. Start with a panel you already know has defects, typically the hood or a front fender where swirls accumulate. Move your head slowly from side to side while keeping your eyes on the same section of paint. Properly configured lighting will make scratches appear and disappear as you shift your viewing angle, creating that telltale “flickering” effect professionals rely on.
Walk a complete 360-degree circle around the vehicle at a slow, steady pace. Watch for dark patches or inconsistent reflections that indicate shadow zones where your lighting doesn’t overlap. If you lose visibility on curved sections like wheel arches or door handles, your secondary cross-lighting needs repositioning. The goal is uniform defect revelation across every body panel, not just flat surfaces.
Test your system’s sensitivity by looking for fine 1000-2000 grit sanding marks or light swirls from automated car washes. These shallow scratches represent the threshold of what you need to detect before polishing. If you can clearly see them under your current setup, you’ve achieved proper inspection-grade lighting. If you’re only catching deeper scratches or buffer trails, increase your lumen output or adjust the light angle closer to 30 degrees.
Document your baseline with photos taken from consistent positions around the vehicle. Use your phone camera without flash, capturing what the lighting reveals at hood center, driver’s door, and rear quarter panel. These reference images help you replicate successful setups for future jobs and identify when bulbs dim over time. When every defect you photograph is visible to your naked eye first, your verification is complete.
Common Lighting Setup Mistakes and How to Fix Them
Even experienced detailers make predictable lighting errors that sabotage defect visibility. Here’s how to identify and correct the most common setup problems before they waste your time.
Positioning lights directly overhead or perpendicular to the paint surface creates the single biggest visibility failure. You’ll miss shallow scratches and swirl marks entirely because the light reflects straight back without catching defect edges. Move your primary lights to 30-45 degree angles from the panel surface. If you’re still seeing only a smooth reflection, increase the angle further until surface imperfections become visible as dark lines against the illuminated paint.
Insufficient lumen output leaves you squinting at shadows and guessing whether what you’re seeing is an actual defect or just inadequate lighting. If you can’t clearly see 2000-grit sanding marks on test panels, your fixtures aren’t bright enough. Add a second light source or upgrade to higher-lumen LEDs rated at minimum 2000 lumens per fixture. Two 3000-lumen lights positioned at opposing angles consistently outperform a single 6000-lumen source.
- Lights too perpendicular, Increase angle to 30-45 degrees from panel surface
- Insufficient brightness, Add fixtures or upgrade to minimum 2000 lumens each
- Wrong color temperature, Adjust to 5000-6500K daylight spectrum
- Excessive glare, Add diffusion filters or reposition lights farther from vehicle
- Inadequate solar battery capacity, Calculate runtime needs and upsize storage by 30%
Color temperature errors cause equally serious problems. Warm light below 4000K hides oxidation and makes holograms nearly invisible, while cool light above 7000K creates false contrast that exaggerates minor imperfections. Stick to the 5000-6500K range for accurate defect assessment.
Glare from overly bright or poorly positioned lights creates wash-out zones where defects disappear. If you’re seeing hot spots that force you to look away, pull the lights back 12-18 inches or add diffusion panels to soften the beam.
Solar-powered setups introduce a specific failure mode: battery depletion mid-inspection. If your lights dim noticeably after 90 minutes, your storage capacity is inadequate for extended correction sessions. Calculate your actual runtime requirements and maximize solar output by upsizing battery capacity by 30 percent beyond your estimated needs. A properly sized system maintains consistent brightness for four to six hours of continuous inspection work.
Maintaining Your Inspection Lighting System
Your lighting system needs regular attention to deliver consistent defect visibility month after month. Start by wiping LED lenses with a microfiber cloth every thirty days, dust and overspray film reduce brightness by 15-20%, making subtle scratches disappear. If you’re running solar panels, inspect them bi-weekly for leaves, bird droppings, or pollen buildup that blocks sunlight. A quick rinse with plain water restores full charging capacity.
Watch for dimming bulbs. LEDs don’t burn out suddenly; they fade gradually. When you notice defects becoming harder to spot under lights that used to reveal everything, swap the bulbs before your next paint correction session. Don’t wait until they’re obviously weak.
Detailing environments stay humid. Check all electrical connections quarterly, looking for corrosion on plugs and battery terminals. Apply dielectric grease to exposed contacts on solar battery packs, it prevents moisture damage that kills portable units prematurely.
Store solar work lights indoors between jobs. Leaving them in your van through freezing nights or summer heat shortens battery life. Keep them at room temperature when possible.
For grid-powered systems, vacuum cooling vents on high-intensity fixtures every other month. Clogged vents cause overheating, which accelerates LED degradation and shifts color temperature over time. Clean equipment reveals defects. Neglected equipment hides them.
Frequently Asked Questions About Paint Correction Lighting
Regular workshop lighting wasn’t designed for paint inspection. Overhead fluorescents and standard LEDs create diffused illumination that hides the very defects you need to see. The difference between general-purpose lighting and a proper inspection setup comes down to three factors: intensity (you need focused brightness, not ambient fill), angle (oblique light reveals scratches that perpendicular light conceals), and color temperature (most shop fixtures run too warm to show true paint condition). Switching to dedicated inspection lighting transforms what’s visible on your panels.
How many lumens do I really need per fixture?
Minimum 2000 lumens per light source for effective defect visibility on automotive paint. Professional detailers often run 3000-5000 lumens on dark colors where swirls hide more easily, but starting at 2000 gives you enough intensity to spot medium scratches and oxidation.
Will solar panels work in my climate for paint correction lighting?
Yes, with proper battery sizing to store energy for extended inspection sessions. Even regions with limited direct sunlight can support solar-powered LED work lights by calculating your daily runtime needs and selecting battery capacity accordingly, the solar panel lifespan and consistent output make this a viable long-term investment across all climates.
Do I need different lighting for ceramic-coated vehicles?
No, the same principles apply: 5000-6500K color temperature at 30-45 degree angles with sufficient intensity. Ceramic coatings actually make defect inspection easier because the reflective surface amplifies light, revealing imperfections more clearly than uncoated paint.
How do I scale my lighting setup for large vehicles like RVs or commercial trucks?
Add light sources rather than increasing distance from the panel. Position one high-intensity LED per major section (hood, doors, rear quarters) and move them sequentially as you inspect, or invest in four to six portable solar LED units that you can reposition around the vehicle’s perimeter for complete coverage without multiplying your electrical costs.
The investment in proper inspection lighting pays for itself quickly. You’ll catch defects before wasting polish on improperly diagnosed panels, reduce correction time by working with accurate information from the start, and deliver results that hold up under any lighting condition once the vehicle leaves your workspace.
Seeing every swirl, scratch, and oxidation mark before you start polishing transforms your paint correction results. When you invest time in proper lighting setup, you cut rework, waste fewer pads and compounds, and deliver finishes that rival professional studios.
The principles we’ve covered aren’t complicated: position your lights at 30-45 degree angles, use 5000-6500K daylight spectrum bulbs, ensure adequate intensity across all panels, and eliminate shadow zones with cross-lighting. Solar-powered systems bring these same professional standards to your workspace while slashing electricity costs month after month, whether you’re a weekend enthusiast working in your driveway or a mobile detailer serving clients on-site.
Start with the step-by-step process outlined earlier. Walk through each setup phase methodically, then refine based on what your specific vehicle surfaces and workspace reveal. You’ll quickly develop an eye for optimal positioning and learn which adjustments make the biggest difference for your typical projects.
Professional-grade defect visibility isn’t reserved for high-end body shops with expensive infrastructure. Smart lighting investment, sustainable power choices, and attention to setup details put that capability within reach for anyone committed to excellence in paint correction.