Power Your Garden Naturally: Garden Solarization Meets Solar Tools
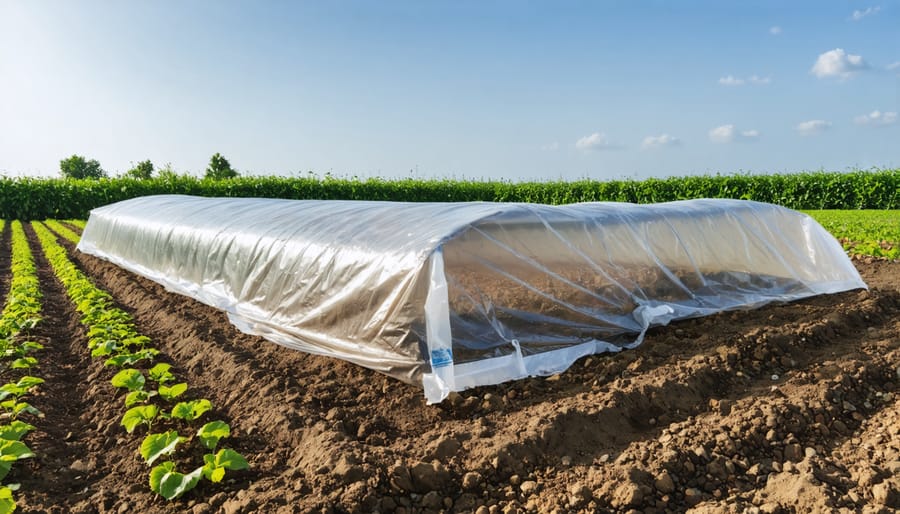
Transform your garden into a natural weed-eliminating zone through garden solarization, one of the most effective sustainable gardening practices available today. Clear the target area completely, removing all plant material and debris. Thoroughly soak the soil to a depth of 12 inches, creating optimal heat-conducting conditions. Cover the prepared area with clear, UV-stable plastic sheeting (1-4 mil thickness), securing edges tightly with soil or landscape pins to trap heat. Maintain the plastic cover for 4-6 weeks during peak summer temperatures, allowing soil temperatures to reach 140°F and effectively eliminate weeds, pathogens, and pest larvae. This chemical-free method prepares your soil for immediate planting while preserving beneficial soil microorganisms and reducing long-term maintenance needs.
What is Garden Solarization?
How Solar Heat Transforms Your Soil
When sunlight hits the clear plastic covering your soil, it creates a powerful greenhouse effect that transforms your garden bed into a natural sterilization chamber. As temperatures rise beneath the plastic, they can reach anywhere from 110°F to 140°F (43°C to 60°C), creating an environment that’s too hostile for most garden pests and pathogens to survive.
This heat penetrates the top 4-6 inches of soil, effectively eliminating harmful organisms like fungal diseases, bacterial infections, nematodes, and weed seeds. The process works by literally cooking these unwanted guests, while also breaking down organic matter into nutrients your plants can use later.
The intense heat also accelerates chemical processes in the soil, making nutrients more available to future plants. Think of it as a reset button for your soil’s ecosystem. While beneficial organisms might temporarily decrease, they quickly recolonize the soil once temperatures return to normal, creating a healthier growing environment.
For best results, maintain these high temperatures for at least 4-6 weeks during the hottest part of summer. The longer you can keep the soil heated, the more effective the sterilization process becomes.
Benefits for Your Garden
Garden solarization offers multiple benefits that make it an excellent choice for natural soil improvement. This chemical-free method effectively eliminates harmful soil-borne pathogens, weed seeds, and pests that could damage your plants. The process also releases trapped nutrients, making them more available for future plant growth.
Beyond pest control, solarization improves soil structure and promotes beneficial microorganisms that thrive in the treated environment. Your garden soil becomes more fertile and workable, leading to healthier plant growth and better yields. The heat treatment breaks down organic matter faster, enriching the soil naturally.
Best of all, solarization is environmentally friendly and cost-effective. You’ll spend less time weeding and dealing with plant diseases, and you won’t need harmful pesticides or expensive soil treatments. This sustainable approach aligns perfectly with organic gardening practices while delivering professional-grade results.
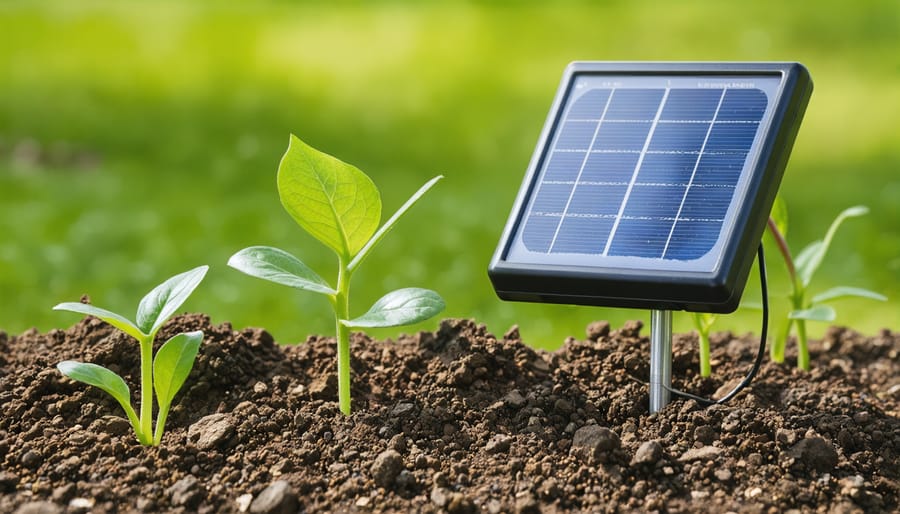
Solar-Powered Tools for Solarization Success
Solar Soil Moisture Monitors
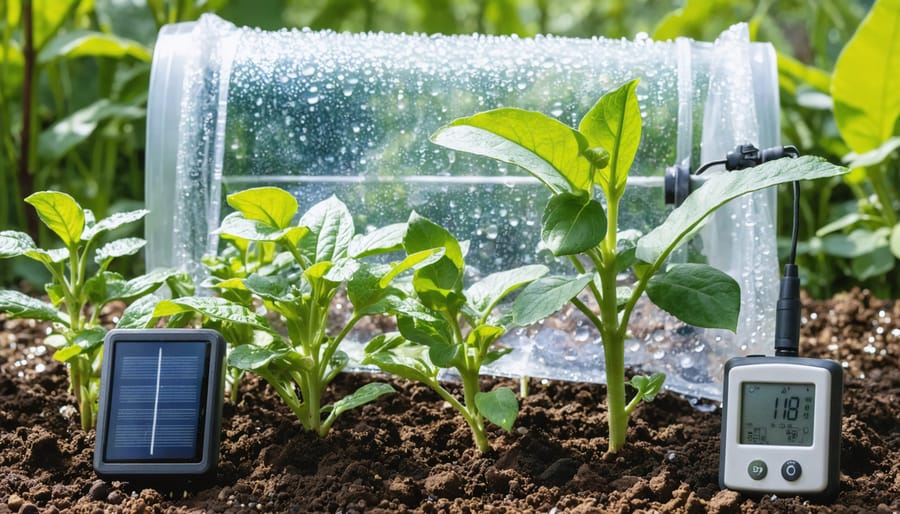
Modern solar-powered monitoring systems have revolutionized the way we track soil conditions during garden solarization. These smart devices use sensors to measure moisture levels, temperature, and humidity, providing real-time data to ensure optimal solarization results.
By placing moisture monitors strategically throughout your solarized area, you can ensure the soil maintains proper moisture levels for effective heat treatment. The sensors typically connect to your smartphone through an app, sending alerts when conditions fall outside ideal ranges. This helps you maintain the perfect balance – soil that’s moist enough to conduct heat but not waterlogged.
Most solar soil moisture monitors are self-sufficient, using built-in solar panels to power their operation. They’re designed to withstand high temperatures under plastic sheeting and continue functioning throughout the solarization process, which typically lasts 4-6 weeks. Some advanced models even track soil temperature progress, helping you determine when your solarization treatment is complete.
These monitoring tools take the guesswork out of garden solarization, making the process more reliable and effective for both beginners and experienced gardeners.
Solar Temperature Sensors
Monitoring soil temperature during garden solarization is crucial for success, and modern solar-powered temperature sensors make this task easier than ever. These smart devices combine sustainable power with precise temperature tracking, helping you achieve optimal results.
Digital soil thermometers with solar-charged batteries are particularly useful, as they can provide continuous monitoring without the need for battery replacements. Most models feature LCD displays showing real-time readings, with some offering wireless connectivity to your smartphone for remote monitoring.
For best results, place at least two sensors at different depths – one at 4 inches and another at 6 inches below the soil surface. This helps ensure even heat distribution throughout your garden bed. Look for sensors with weather-resistant construction and temperature ranges between 32°F and 180°F (0°C to 82°C).
Many gardeners find multi-probe systems especially helpful, as they can monitor several areas simultaneously. Some advanced models even include soil moisture sensors and can send alerts when temperatures reach optimal levels for solarization, typically around 120°F (49°C).
Remember to position the solar panel component where it receives maximum sunlight while keeping the display easily readable from your viewing angle.
Step-by-Step Solarization Process
Timing and Weather Considerations
Garden solarization is most effective during the peak summer months when sunlight is abundant and temperatures are consistently high. The best time to start is late spring or early summer, typically between June and August in most regions. This timing allows you to maximize solar efficiency and achieve optimal soil temperatures.
Choose a period when your weather forecast shows at least 4-6 weeks of sunny, clear days ahead. Soil temperatures need to reach between 110°F and 125°F (43-52°C) at a depth of 6 inches to effectively eliminate pests and pathogens. Avoid starting the process during rainy seasons or when overcast conditions are expected, as this will reduce effectiveness and extend the required treatment time.
For best results, prepare your garden bed when the soil is already warm and slightly moist but not waterlogged. Morning installation is ideal, as it allows the plastic to heat up gradually throughout the day. If you live in a cooler climate, you might need to extend the solarization period to 8-10 weeks to achieve desired results.
Material Selection and Setup
Successful garden solarization starts with selecting the right materials. Clear plastic sheeting is essential, and you’ll want to choose a thickness between 1-4 mil. While thicker plastic is more durable, thinner sheets actually allow better heat penetration. Clear plastic works better than black plastic because it allows more sunlight to reach the soil.
Before laying the plastic, prepare your garden bed by removing all plants, weeds, and debris. Break up any large soil clumps and rake the surface smooth. The soil should be level but not completely flat – a slight slope helps prevent water pooling. Water the soil deeply until it’s moist to a depth of 12 inches, as moisture helps conduct heat more effectively.
For best results, cut your plastic sheeting to size, allowing an extra 6-12 inches on all sides for secure anchoring. You’ll also need garden stakes or heavy rocks to hold the plastic in place. Having a helper makes the installation process much easier, as handling large sheets of plastic can be tricky on your own.
Remember to choose a time when you’ll have several weeks of sunny, hot weather ahead. Summer is typically ideal for solarization in most regions.
By combining garden solarization with solar-powered tools, you’re creating a truly sustainable approach to garden management. The natural soil sterilization process of solarization pairs perfectly with eco-friendly solar tools, reducing both pest problems and your carbon footprint. This dual approach not only saves money on utilities and chemical treatments but also contributes to healthier soil and a more sustainable garden ecosystem. Garden enthusiasts who embrace both methods report stronger plant growth, fewer pest issues, and significantly lower maintenance costs. As you move forward with your gardening projects, consider how implementing both solarization and solar-powered equipment can help you create a more environmentally responsible and efficient garden space that thrives year after year.


