
Perfect Your Inverter Installation With This Essential Wiring Blueprint
Master your inverter installation with precision-engineered wiring diagrams that safeguard your renewable energy investment. Understanding proper safe solar wiring practices transforms complex electrical connections into manageable, secure installations that maximize system performance.
Wiring diagrams serve as your critical roadmap, detailing every connection between your power source, inverter, batteries, and load distribution panel. These technical blueprints eliminate guesswork, ensuring proper voltage matching, current flow, and grounding requirements while preventing costly mistakes that could damage equipment or create safety hazards.
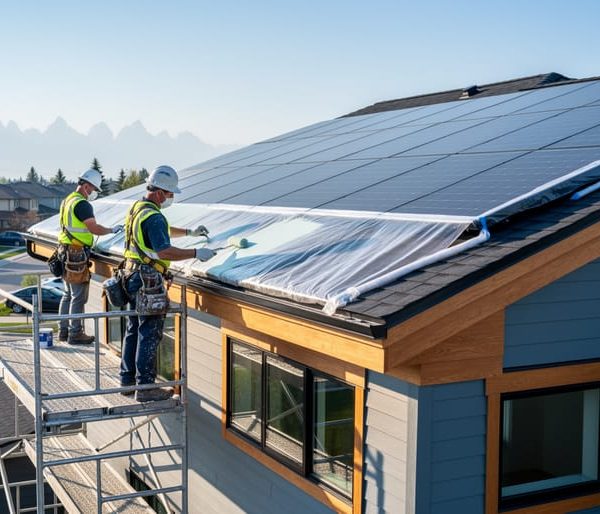
Whether you’re installing a modest off-grid system or a sophisticated grid-tied solution, precise wiring documentation guides you through component placement, cable sizing, and protection device integration. Modern inverter systems demand meticulous attention to detail – from proper terminal identification to strategic conductor routing – all clearly illustrated in comprehensive wiring schematics that empower both DIY enthusiasts and professional installers to achieve optimal results.
Professional installation starts with understanding your specific inverter’s wiring requirements, ensuring compliance with local electrical codes, and implementing robust safety measures that protect your investment for years to come.
Understanding Your Inverter Wiring Diagram Components
Basic Wiring Symbols and Their Meanings
Understanding electrical symbols is crucial when working with modern inverter configurations. Here are the essential symbols you’ll encounter in inverter wiring diagrams:
The power source (usually battery or solar panels) appears as a long and short parallel line. A ground connection is shown as three parallel horizontal lines of decreasing length. Switches are represented by a broken line with a small circle at one end, while circuit breakers look similar but include a zigzag symbol.
For wiring connections, solid lines represent the main power cables, while dotted lines indicate control or communication wiring. Resistors appear as a zigzag line, and capacitors are shown as two parallel straight lines. The inverter itself is typically represented by a rectangle with “INV” or “DC-AC” written inside.
You’ll also see symbols for fuses (a zigzag line in a circle), terminals (small circles), and junction points (dots where wires meet). Understanding these basic symbols helps you read and follow wiring instructions safely and effectively.

Critical Connection Points
When wiring your inverter, pay special attention to these essential connection points to ensure optimal performance and safety. The DC input terminals, typically marked with positive (+) and negative (-) symbols, must be connected to your battery bank with the correct polarity. Double-check these connections, as reverse polarity can seriously damage your system.
The AC output terminals are equally crucial, usually consisting of three main connections: Line (L), Neutral (N), and Ground (G). These connect to your home’s electrical panel or directly to your appliances, depending on your setup. Many modern inverters also feature a dedicated grounding terminal, which should be connected to your system’s ground rod for safety.
For grid-tied systems, look for grid connection terminals marked “Grid In” or “AC Grid.” These allow your inverter to synchronize with utility power. Smart inverters often include communication ports – typically RS485 or ethernet connections – enabling system monitoring and data logging.
Remember that all connection points should be secured firmly with the recommended torque settings to prevent loose connections that could cause arcing or system failure.
Step-by-Step Wiring Connection Process
Battery Connections
Proper battery connections are crucial for your inverter’s performance and safety. Start by identifying your battery bank’s voltage requirements – typically 12V, 24V, or 48V depending on your inverter specifications. Always use cables of the correct gauge; thicker cables are needed for higher current applications to prevent voltage drop and overheating.
Connect the batteries in series or parallel configuration based on your system’s voltage needs. For series connections, link the positive terminal of one battery to the negative terminal of the next. For parallel connections, connect positive terminals together and negative terminals together.
When connecting to the inverter, follow these steps:
1. Connect the negative (black) cable to the inverter’s negative terminal
2. Attach the other end to the battery bank’s negative terminal
3. Connect the positive (red) cable to the inverter’s positive terminal
4. Finally, connect to the battery bank’s positive terminal
Always use properly rated circuit breakers or fuses between batteries and inverter for protection. Install these as close to the battery bank as possible. Consider using battery terminal protectors and applying anti-corrosion compound to prevent oxidation.
Remember to double-check all connections before powering up your system. Loose connections can cause system failure and pose safety risks. For multiple battery setups, ensure all batteries are of the same type, age, and capacity for optimal performance.

Solar Panel Integration
Connecting solar panels to your inverter system is a crucial step in successful solar power system integration. Start by arranging your solar panels in the recommended series or parallel configuration based on your inverter’s specifications. Each panel should connect to a junction box, which houses the positive and negative terminals.
For optimal performance, use properly rated solar cables (typically 10 or 12 AWG) with weatherproof connectors. Connect the positive (red) and negative (black) cables from each panel to their corresponding terminals in the junction box. From there, run the main cables to your solar disconnect switch – a safety feature that allows you to cut power flow when needed.
Next, connect the cables from the disconnect switch to your inverter’s DC input terminals, maintaining correct polarity throughout. Double-check all connections to ensure they’re tight and properly insulated. Many modern solar panels come with pre-attached MC4 connectors, making the connection process more straightforward and secure.
Remember to install surge protection devices between the panels and inverter to guard against voltage spikes. Once all connections are complete, seal any exposed cable entries to prevent moisture infiltration. Before activating the system, have a qualified electrician verify all connections meet local electrical codes.
AC Output Connections
The AC output connections are a crucial part of your inverter installation, linking your system to your home’s electrical infrastructure. Start by locating your main electrical panel and ensuring you have the proper permits and approvals from your local authorities. For optimal performance, follow these advanced inverter setup guidelines during installation.
Connect the inverter’s AC output cables to your home’s electrical system through a dedicated circuit breaker. Use appropriately sized cables based on your inverter’s output rating – typically, 6-10 AWG copper wire for residential systems. Install a double-pole circuit breaker rated for your inverter’s maximum output current in your main panel.
Always maintain proper polarity when connecting the AC output: line (usually black or red), neutral (white), and ground (green or bare copper). Install a visible disconnect switch between the inverter and your main panel for safety during maintenance. This switch should be readily accessible and clearly labeled.
Remember to weatherproof all outdoor connections using appropriate junction boxes and conduit. Double-check all connections before powering up the system, and consider having a licensed electrician verify your work to ensure compliance with local electrical codes and safety standards.
Safety Measures and Best Practices
Required Safety Equipment
Before working with inverter wiring, ensure you have all the necessary safety equipment on hand. Start with personal protective gear: insulated gloves rated for electrical work, safety glasses with side shields, and non-conductive footwear. A properly rated multimeter is essential for testing voltage and ensuring circuits are dead before you begin work.
Keep a Class C fire extinguisher nearby for electrical fire safety. You’ll also need insulated tools, including wire strippers, crimpers, and screwdrivers with rubber-coated handles. A voltage tester pen can provide quick circuit checks, while electrical tape and wire nuts help ensure secure connections.
For emergency situations, have a first aid kit readily accessible. If working in low-light conditions, use a battery-powered LED work light rather than corded options. Consider wearing flame-resistant clothing for additional protection, and always keep a phone nearby for emergency calls.
Remember to check that all safety equipment is in good condition and properly rated for your specific application before starting any work.

Common Wiring Mistakes
When installing an inverter system, even small wiring mistakes can lead to significant problems. Here are the most common errors to watch out for and how to prevent them:
Reverse polarity connections are perhaps the most frequent mistake. Always double-check that your positive (usually red) and negative (usually black) cables are correctly connected. Using colored tape or markers can help you maintain proper identification throughout the installation process.
Another common error is using undersized cables. This can cause voltage drops and reduce system efficiency. Make sure to calculate the correct wire gauge based on your system’s amperage and distance. When in doubt, it’s better to go with a slightly thicker cable than risk using one that’s too thin.
Many DIY installers forget to properly ground their systems. Every inverter needs a solid ground connection to ensure safety and proper operation. Connect the ground wire to an appropriate grounding point, such as a ground rod or your home’s existing grounding system.
Loose connections are another frequent issue that can cause system failure or even fires. Always use the proper torque specifications when tightening terminal connections, and perform regular checks to ensure they haven’t loosened over time.
Improper fusing is also a common oversight. Each major circuit needs appropriate overcurrent protection. Install correctly sized fuses or circuit breakers on both DC and AC sides of the inverter.
Lastly, many people make the mistake of not leaving enough space around the inverter for proper ventilation. Ensure there’s adequate clearance on all sides according to the manufacturer’s specifications to prevent overheating.
Understanding and properly implementing your inverter’s wiring diagram is crucial for the success and safety of your renewable energy system. Throughout this guide, we’ve explored the essential components, connection methods, and safety protocols that make up a well-designed inverter installation.
Remember that a correctly wired inverter not only ensures optimal performance but also protects your investment and maintains the safety of your property. The color-coding system, proper cable sizing, and strategic placement of components all work together to create a reliable power conversion system that will serve you for years to come.
We’ve seen how proper grounding acts as your system’s foundation, protecting both equipment and users from electrical hazards. The careful selection of appropriate cables and connectors, combined with precise installation techniques, helps maximize energy efficiency and minimize power losses.
Many homeowners who’ve followed these guidelines report significant improvements in their system’s performance and reliability. Take Sarah from California, for example, who shares: “After properly rewiring my inverter system following these specifications, I noticed an immediate improvement in my solar system’s efficiency and haven’t experienced any shutdowns since.”
While the process might seem complex at first, breaking it down into manageable steps makes it achievable for those with basic electrical knowledge. However, never hesitate to consult a qualified electrician if you’re unsure about any aspect of the installation. Your safety and system performance are paramount.
As you move forward with your inverter installation or maintenance, keep these key points in mind:
– Always prioritize safety protocols
– Double-check all connections before powering up
– Maintain proper documentation of your system’s wiring
– Schedule regular maintenance checks
– Stay updated with local electrical codes and regulations
By following these guidelines and maintaining attention to detail, you’re well on your way to achieving an efficient, safe, and reliable inverter system that will contribute to a more sustainable future while reducing your energy costs.


